There are many ways to attach a leash to a surfboard and at first glance it may seem obvious. However, some techniques are far from perfect and could eventually put you in a dangerous situation, especially in challenging ocean conditions.
Below is a list of the supplies you will need to properly attach a surfboard leash:
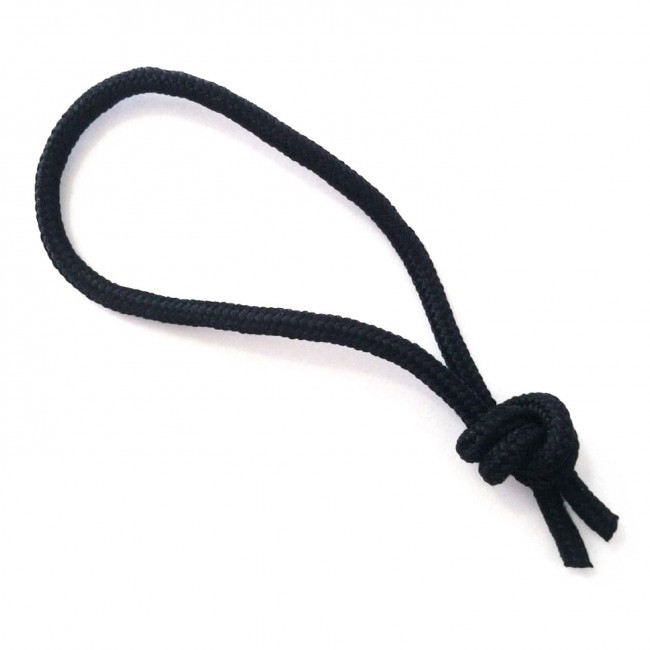
First, unpack your leash and make sure the leash cord is present as it usually comes with the purchase of a new leash. It is also common to use parachute cord due to its strength. Whichever leash cord you use, you need to make sure it is approximately 10 inches in length. It is also a good idea to light the ends on fire so it becomes easier to tie and it doesn’t come unraveled.
Tying the Leash String
There are a lot of different knots that can be used to attach the leash cord. It seems as if the overhand knot is the most preferred. Feel free to consult your local Cub Scout or friendly angler for a full list of knots.
Velcro Strap Connection
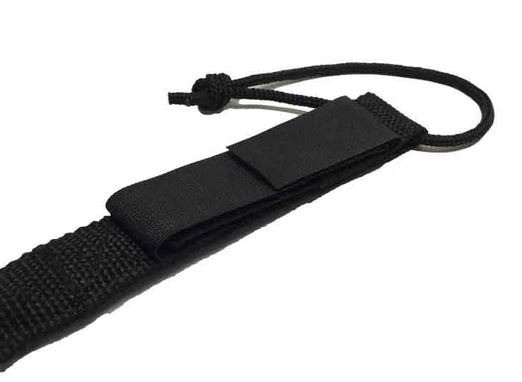
Before tying the knot, check the type of leash you have. There are two typical connections that you’ll find; either a sewn loop connection or a Velcro strap connection. With the sewn loop, you must ensure that the leash cord is threaded through the loop BEFORE you tie the knot. With the Velcro strap, you can tie the knot right away.
- Fold the cord in half and hold both ends.
- With the cord folded in half, tie a basic overhand knot. Don’t forget, if you have a sewn loop leash as above, then you need to thread the cord through the leash loop first.
- Pulling towards the untied ends, close the loop tightly. Leave a little of the open ends sticking out so the knot will not pull free when it tightens in the water.
With the sewn loop, move the knot around so it is covered by the leash loop. This will keep the knot out of the way for the next step. As mentioned, other knots can be used. The most important thing is that the knot is tied very tight.
Attaching the Leash to the Surfboard
Once the knot is tied, you then need to thread the leash cord through the leash plug on your board.
- Straighten the cord out and pinch the end opposite the knot together.
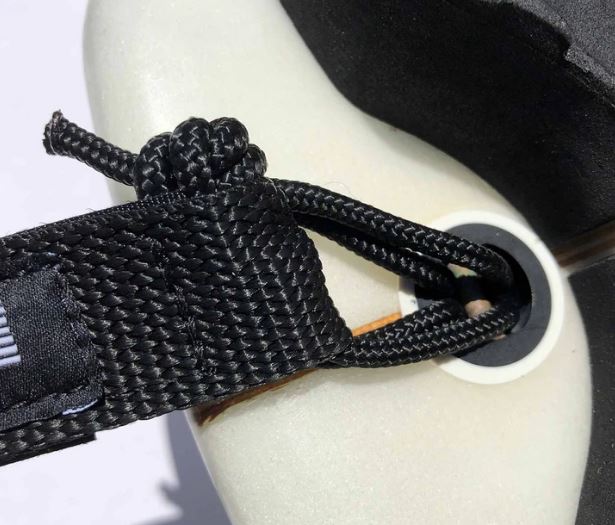
- Thread the end through the leash plug and out the other side.
- Now you need to attach the Velcro leash to the leash cord. If you have the sewn loop type, then it will already be attached.
- The Velcro leash needs to be threaded through both of the loops of the cord instead of slipping the leash cord through itself. This ensures the strongest attachment and hides the knot within the Velcro part and out of the way.
- Once threaded through, close the Velcro tight.
- If you have the sewn loop leash then you will need to slip the leash cord through itself. You can then pull the leash all the way through and tighten.
- It is important that the leash cord doesn’t reach the rail of your surfboard. If the leash cord reaches the rail, it can end up damaging it while surfing. The loop should be a length that allows the leash’s rail saver to rest on the board rail. See picture below.
It is important to note the Velcro strap connection will have double the strength of the sewn loop connection when you attach a leash to a surfboard. This is a huge factor to consider when buying a surfboard leash. Check out this post for more information on how to buy the best surf leash.
Things to Remember
- Got a sewn loop leash? Thread it before tying the knot.
- Leave a little of the ends of the loop showing. The knot will tighten when used for the first few sessions.
- Pull the knots as tight as possible to start with; it will save problems later.
- Check your cord for wear regularly, and replace when it begins to fray.
- Don’t make the loop too large. If the cord reaches the rail of your surfboard, the rail will become damaged while surfing. The loop should be a length that allows the leash’s rail saver to rest on the board rail.

