Dropper seatposts, or popularly referred to as dropper posts, are one of the best upgrades you can make to any mountain bike. The awesome on-the-fly adjustment you can make to the height of your seat will have you questioning why you did not buy a dropper post years ago. With a remote actuation that mounts on the handlebars, these seatposts allow riders to change the height of their seat without getting off their bike. No more messing with quick release clamps, or even more annoyingly, searching through a backpack for a multi-tool. If you are considering making the upgrade, there are several important factors to consider when choosing the right dropper post for your bike.
Seat Tube Diameter
Seat posts come in several different diameters, and dropper posts are no different. It is essential to match the diameter of your bike frame’s seat tube with the diameter of the dropper post. If you don’t match the two diameters, the dropper post will not fit.
If you do happen to get the wrong size, do not shove it into your seat tube. The seat post will get stuck and you can risk damaging the seat tube. It is also important note that most companies recommend against, or outright forbid using a shim on a dropper post. This is because the seatpost may not stay in place, leading to over tightening the seat post collar. This could cause poor performance or even possibly damage the internals of the dropper post.
The most common seatpost diameters for mountain bikes are 30.9mm and 31.6mm, but 27.2mm (usually road) and 34.9mm exist too. You can find the diameter of your current seatpost by pulling it out and looking for a number printed or stamped into it. You can also find the diameter of your seatpost by measuring it with calipers or by looking at the specs of your bike online.
Insertion Length
The second most important step when buying a dropper post is to choose the correct insertion length. The insertion length dictates how far into the frame the dropper post will go. As bike geometry has evolved over the years, seat tubes have gotten shorter, and bends in the tube have become more common, so the insertion length is important to make sure a dropper post is compatible with your frame. All dropper posts will have a minimum insertion length and it is important to insert to at least this length. If your dropper post isn’t inserted into the frame far enough you risk breaking the post or even worse, damaging the seat tube.
Travel of Dropper Post
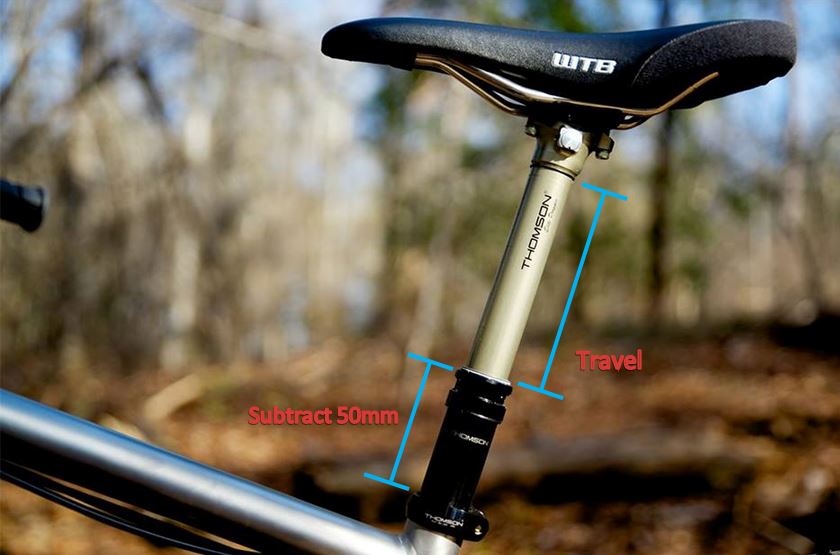
The travel measurement of a dropper post dictates how far the post can extend. Typically, dropper posts are available in one of three travel increments: 100mm, 125mm and 150mm. To choose the correct travel dropper post, measure from the seatpost collar to the seat rail (in your climbing, or highest setting) on your current bike. Subtract 50mm from this measurement and the resulting number is the maximum travel length you can comfortably run. Too much travel can put the seat height to high, which will be uncomfortable when fully extended.
The vast majority of dropper posts are going to offer infinite adjustments. That means you can stop the post at any point along its travel. This feature is preferred as it allows a rider to fine tune their saddle depending on the situation. A few posts come with preset positions such as Fox and Specialized. These tend to be a bit cheaper that a dropper post that can be stopped at any point along its travel.
Cable Routing: Internal vs. External
Dropper seatposts use cables to connect the lever on your handlebars to the seatpost itself. These cables are either internally routed through the frame, or secured to the outside of the frame using the designated mounts (externally routed). Some bikes are setup for internal routing, which helps reduce clutter on the bike. Internal routing also reduces the chances of anything getting snagged while riding. Meanwhile, externally routed dropper posts are easier to setup and service. It is important to note that you cannot run an internally routed dropper post with a bike frame that is not specifically equipped for internal cable routing.
Mechanical vs. Hydraulic vs. Electronic
Dropper posts are actuated either mechanically, hydraulically or electronically. Each system has its pros and cons. Mechanical dropper posts are often the most simple and the cheapest upfront, as well as the easiest to service. Hydraulic actuation droppers offer smoother performance but servicing requires bleeding the line, much like hydraulic disc brakes. Electronic dropper posts offer a nice closed system and clean routing, however, they are the most expensive. Hydraulically or electronically actuated droppers can have longer service intervals because it is a closed system. the cables in the mechanically actuated systems can get contaminated by dirt and moisture, degrading performance.
Setting up a Dropper Post
Once you have chosen your new dropper post, it is time to install it on your bike. You can bring it into a shop, or do it yourself. The process is straightforward, although setting up internally routed cables can be frustrating as it is like threading a needle in the dark. Important things to pay attention to here are the position of the remote and the length of the cables.
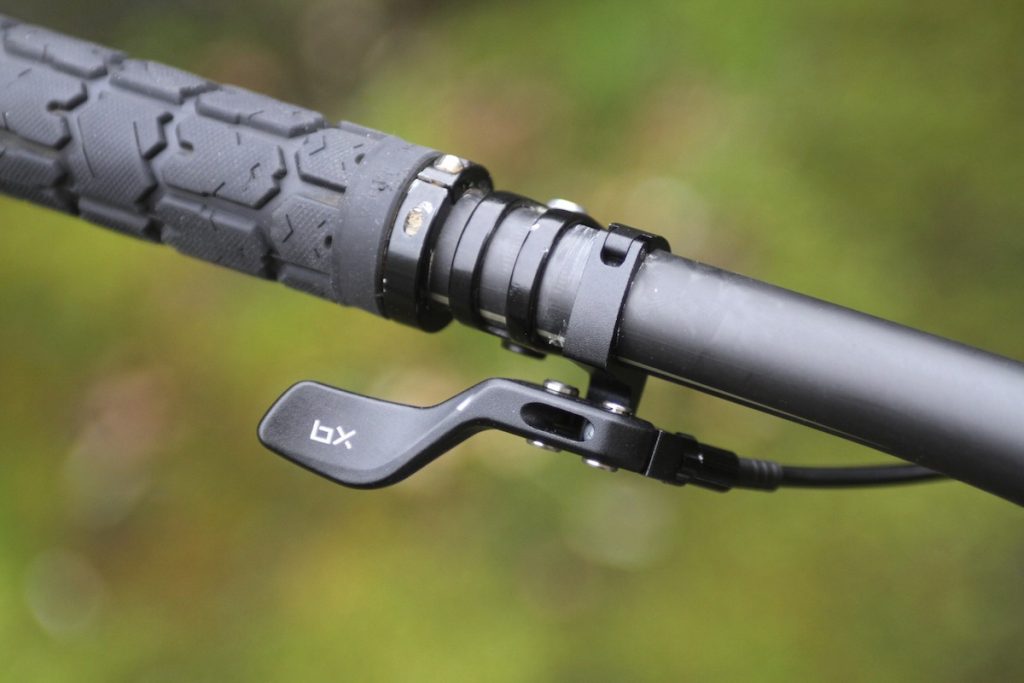
Find the most comfortable place on the handlebars for your dropper remote. The easier it is to use, the more you will be able to take advantage of it. With front derailleurs becoming less common because of better 1x drivetrains, many riders opt to place their dropper remote where their front shifter would go on their handlebars.
If you decide to install a dropper seatpost yourself, you will likely have to cut the cable to the correct length. It is important to make sure the dropper post is fully extended when measuring the length of the cable. If the dropper post isn’t fully extended you will likely come up short. This is not only annoying, but costly as you will likely have to buy a new cable. You also want to make sure the cable is long enough so the handlebars can comfortably turn back and forth.
When properly installed, the seatpost at full extension should be at your preferred seat height for climbing.
Riding with a Dropper Post
Fully extended, your dropper seatpost should be in a good natural climbing position. A natural climbing position means having your knees slightly bent at the bottom of your pedal stroke. This allows you to get the most efficiency while climbing. You typically want to drop your seat when you encounter technical obstacles or downhill sections. This allows you to get the seat out of the way, and to get your weight lower as well as further back. Other great opportunities to drop your seat post include rough sections, cornering, or when jumping. Getting the seat out of the way allows you to move more freely, which will give you greater control. Don’t forget to show off the convenience of adjusting your seat from the cockpit to your friends, especially those who have yet to make the upgrade!
Favorite Dropper Posts
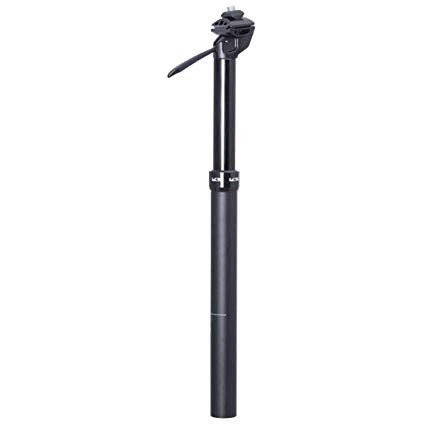
KS eTEN - $150
Diameter - 27.2mm, 30.9mm, 31.6mm
Travel - 100mm
Routing - Internal, External or Lever
Actuation - Mechanical
Adjustment - Infinite
Specialized Command Post IRCC - $350
Diameter - 30.9mm or 31.6mm
Travel - 75mm, 100mm, or 125mm
Routing - Internal
Actuation - Mechanical
Adjustment - 10 Preset Positions
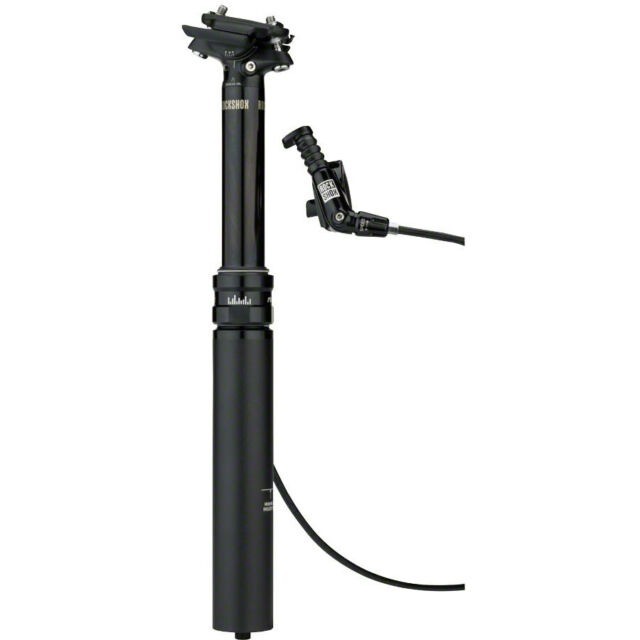
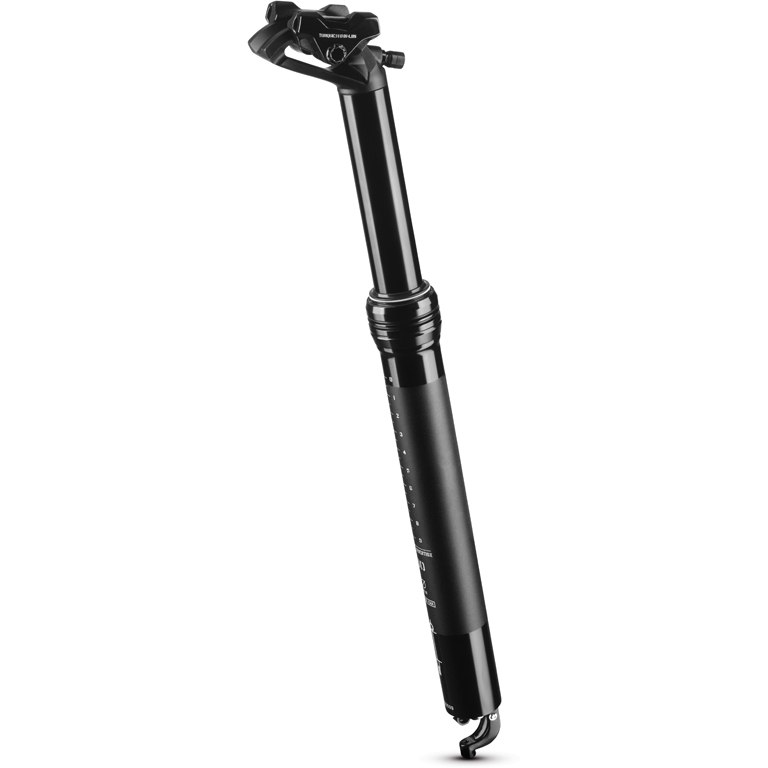
RockShox Reverb Stealth - $400
Diameter - 30.9mm, 31.6mm, or 34.9mm
Travel - 100mm, 125mm, or 150mm, 175mm, 200mm
Routing - Internal
Actuation - Hydraulic
Adjustment - Infinite
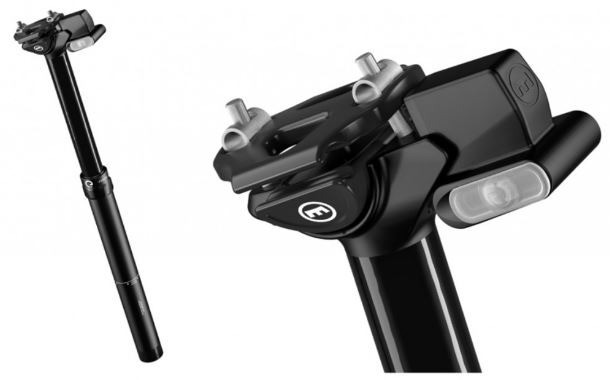
Magura Vyron - $460
Diameter - 30.9mm or 31.6mm
Travel - 150mm
Actuation - Electronic
Adjustment - Infinite