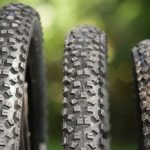
Installing tubeless mountain bike tires can take a bit of work and can be very frustrating. One of the biggest challenges one might face is trying to get the tire seated correctly onto the rim.
Remove the Presta Valve Core
The most important thing to do when inflating tubeless mountain bike tires is to remove the presta valve core. This will allow a greater volume of air to flow into your tire when seating onto the rim. It is important to check that your tube does in fact have a removable valve core as not all valve cores are removable. See the picture above. To remove the valve core you need to unscrew it using a valve core tool. If you don't have one of these you can use a small adjustable spanner wrench or a pair of needle nose pliers.
Once the valve core is removed you can attach your pump head and start pushing air into the tire. Don't freak out if you start hearing a bunch of loud pops. This is the tire seating onto the rim. Once the loud pops stop, you can remove the pump. When you do this the tire will lose all it's air because the valve core is not installed. Do not worry, the tire will actually stay seated to the rim. Now is the time you want to add your sealant. You will want to add 4-6 ounces of Stans Tire Sealant depending on the size of your rim and tire. Once the sealant is added, re-install your valve core and pump the tire up to your desired pressure.
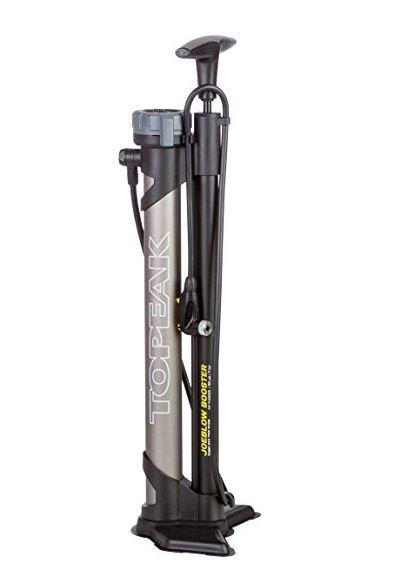
Joe Blow Booster Floor Pump
Sometimes the method above doesn't work because you cannot get air into the tube fast enough. Topeak has invented a pump called the Topeak Joe Blow Booster Floor Pump![]() for this exact problem. The pump is a little pricey, but it is awesome for seating tubeless mountain bike tires.
for this exact problem. The pump is a little pricey, but it is awesome for seating tubeless mountain bike tires.
You start by pushing air (up to 160 p.s.i) into an air chamber attached to the pump. Once the air chamber is filled to the desired p.s.i., you flip a switch on the pump which produces a massive burst of air. This burst of air should help seat the tire onto the rim. Once all the air has been released, you can continue to use the pump as normal and set to the desired pressure. The pump also includes an air release button to fine tune the air pressure. Don't forget to add your sealant before your attach the pump or you will be repeating this process!
Homemade Presta Valve Air Chuck
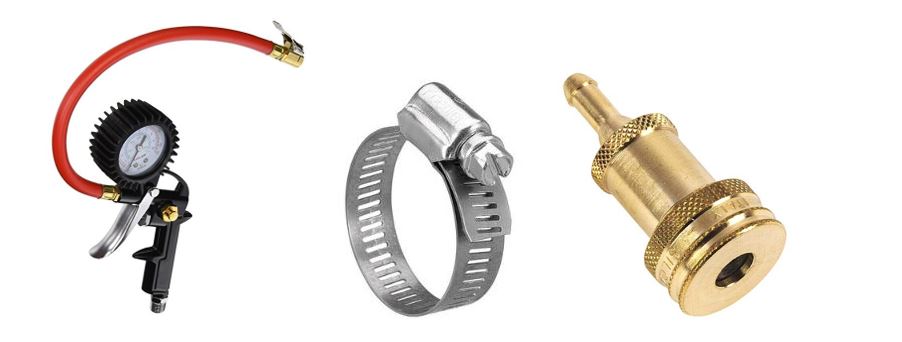
The third method is for those of you who own an air compressor. We all know the air chuck used to fill car tires will not work on presta valves. For around $30 dollars you can make an air chuck that will work for presta valves. You will need the following items:
-
- Pistol Grip Tire Inflator w/ Gauge

- Small Hose Clamp
- Silca Presta Valve Adapter
- Pistol Grip Tire Inflator w/ Gauge
Instructions
If you want to buy these items online, follow the links above. If you are one to get off your couch and go to the store, you can find the Silca presta valve adapter at your local bike shop. You can pick up the other two items at Harbor Freight or any other hardware store for pretty cheap.
It is extremely important to look for a rubber hose when purchasing the pistol grip tire inflator. This is because we are going to cut off the air chuck that comes with it and slip on the Silca presta valve adapter. Once the adapter has been pushed all the way on, you can secure it with the hose clamp. VOILA! You now have an air chuck that will work with presta valves.
In order to inflate and seat tubeless tires with your new air chuck, you are going to want to repeat the steps described above. Simply remove the valve core, attach your new air chuck to the valve and pull the trigger. The air is going to rapidly flow into the tire and you should start hearing a series of loud pops. Once the pops stop, you can remove the air chuck, install your Stans Tire Sealant, re-install the valve core, and inflate to the desired pressure.
Hopefully one of these three tricks will help you install tubeless mountain bike tires easier. If you have any questions or comments please feel free to leave them below.